The summer of 2007 was an eventful one if you were into cell phones. It all started on June 29 when Apple announced the release of the iPhone. If you have never taken the time to watch the full keynote, I highly recommend it.
Reactions to the announcement were mixed. While some dismissed the device, others were eager to try it.
I belonged to the second category. However I lived in Canada where there was no release date in sight. Indeed, the iPhone was never released in the Great White North?[1]. Apple only came to an agreement with Rogers a year later with the 3G on July 11, 2008[2].
For forgotten countries there was hope. A group had assembled with the goal of enabling the device to run with any carrier, using software only[3]. They called themselves the "iPhone Dev Team".
Committed to openness via a blog on iphone.fiveforty.net, they reported their progress on a regular basis. On rich days, updates happened hourly (July 3d came with eight updates from 12AM to 9PM[4]).
Needless to say that during that summer 2007, my web browser was riveted to their website. However I did not have the skills to understand fully what they were doing. Participants were highly skilled, a lot of lingo was being thrown around, and I never dared asking questions.
It always bugged me to not grasp the technological details of such an historic moment. Today I decided to go back in time thanks to the Wayback Machine and get it done. Maybe you will enjoy tagging along with me.
To help follow progress, iphone.fiveforty.net had a status bar on its homepage. It featured all the milestones the DevTeam had identified to reach their goal. There were three levels of accomplishment going from red to green.
I don't remember ever seeing it fully red and I am unsure it ever was. The earliest date crawled by the Wayback machine is Jul 6th, 2007 when two out of six milestones had been reached.
| Break DMG Password | Bypass Activation | Get Write Access | Get Working Toolchain | Unlock Phone | Enable Third-party Applications |
The journey was completed on September 12th, however the Wayback machine "only" crawled thirteen days later on September 25th 2007.
| Decrypt Firmware | Bypass Activation | Get Write Access | Get Working Toolchain | Enable Third-party Applications | Unlock Phone |
We are going to study each stage in order.
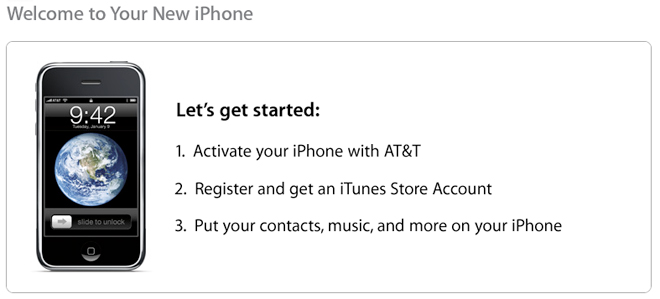
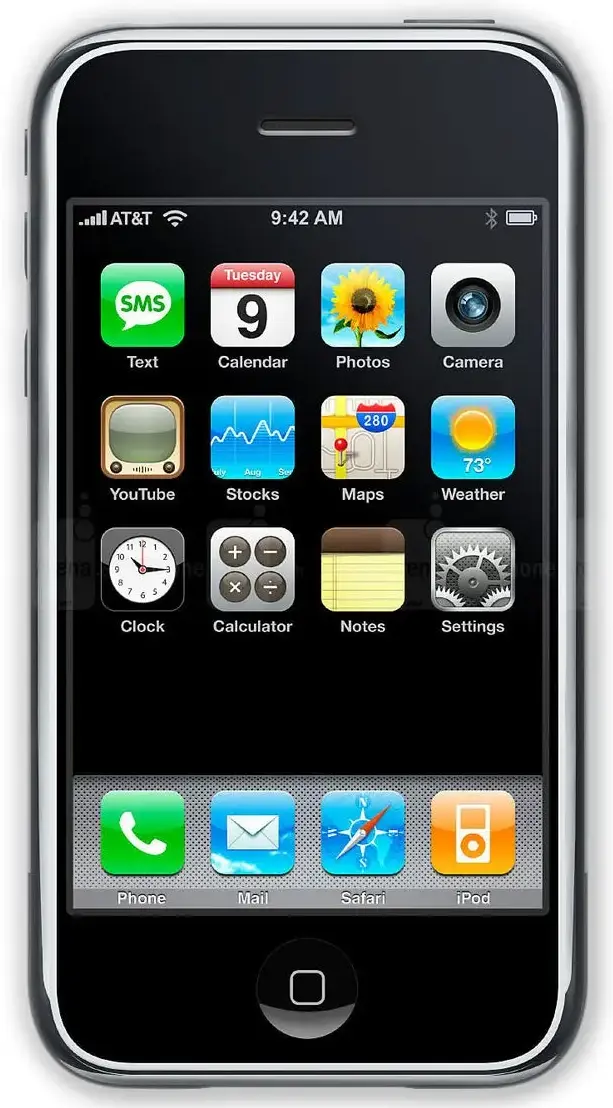
Before diving into each milestone, let's remind ourselves how the iPhone was supposed to be used.
The six milestones defined early one by the DevTeam followed a logical path to turn an inert piece of electronics back into a smartphone.
To restore a device to its factory state, iTunes downloaded an IPhone SoftWare archive (extension .ipsw). The goal of this step was to understand every file in it. Conveniently, the archive is still available on ipsw.me[6] and it uses the zip format so we can look at it.
% unzip -l iPhone1,1_1.0_1A543a_Restore.ipsw
Archive:  iPhone1,1_1.0_1A543a_Restore.ipsw
  Length      Date    Time    Name
---------  ---------- -----   ----
 15725706  06-26-2007 18:41   694-5259-38.dmg
 86257664  06-04-2007 19:32   694-5262-39.dmg
        0  05-22-2007 22:25   Firmware/all_flash/
    14474  05-22-2007 22:21   Firmware/all_flash/applelogo.img2
    73866  05-22-2007 22:21   Firmware/all_flash/batterycharging.img2
    65674  05-22-2007 22:21   Firmware/all_flash/batterylow0.img2
    73866  05-22-2007 22:21   Firmware/all_flash/batterylow1.img2
    43146  05-22-2007 22:21   Firmware/all_flash/DeviceTree.m68ap.img2
   145546  05-22-2007 22:21   Firmware/all_flash/iBoot.m68ap.RELEASE.img2
    51338  05-22-2007 22:21   Firmware/all_flash/LLB.m68ap.RELEASE.img2
      175  05-22-2007 22:25   Firmware/all_flash/manifest
    34954  05-22-2007 22:21   Firmware/all_flash/needservice.img2
    26762  05-22-2007 22:21   Firmware/all_flash/recoverymode.img2
   103562  05-22-2007 22:25   Firmware/dfu/iBSS.m68ap.RELEASE.dfu
     9354  05-22-2007 22:25   Firmware/dfu/WTF.s5l8900xall.RELEASE.dfu
  3073247  06-19-2007 13:51   kernelcache.restore.release.s5l8900xrb
     1594  06-26-2007 18:41   Restore.plist
---------                     -------
105700928                     20 files // All iOS is a mere 105 MiB!!
There are many files in there whose purpose were identified[7][8] fairly early on[9]. Among then we find img2 images displayed on the screen during recovery, the Firmware folder which contains everything for the baseband, and iOS kernel (kernelcache).
More importantly, we see two huge dmg archives. The first one, 694-5259-38.dmg, (called ramdisk[10]) was only used when iTunes restored the phone. Surprisingly, it was not encrypted. A simple dd allowed to mount it.
$ dd if=694-5259-38.dmg of=ramdisk.dmg bs=512 skip=4 conv=sync
$ hdiutil attach ramdisk.dmg
/dev/disk4                                            /Volumes/ramdisk
$ find /Volumes/ramdisk > ramdisk.txt
This is not the iOS filesystem (barely 100 entries) but it allowed the DevTeam to poke into /private/etc/master.passwd and find the password for the user mobile (running the apps), and user root (running all other processes).
More importantly, the content of the ramdisk enabled access to the second dmg file, 694-5262-39.dmg, which contains the iOS filesystem used during normal operation. The archive was encrypted but a key for it was found by looking into /usr/sbin/asr from the ramdisk.
Note that they found a key, not the passphrase. They could not use hdiutil and had to write their own decrypter vfdecrypt.c[11].
Once decrypted, this img could be mounted and they gained read access to the full runtime filesystem (list of files here).
| Break DMG Password | Bypass Activation | Get Write Access | Get Working Toolchain | Unlock Phone | Enable Third-party Applications |
An iPhone out of the box was a brick. It was not activated. After a user subscribed to AT&T, the following happened[12].
albert.apple.com) where it would be signed with Apple's private key.lockdownd, listening over USB verified the token using Apple's public key.lockdownd updated the device state to "Activated".
┌─────────┐
│ iPhone  │
├─────────┤              ┌──────┐      ┌────────────────┐
│lockdownd│              │iTunes│      │albert.apple.com│
└────┬────┘              └──┬───┘      └───────┬────────┘
     │                      │                  │
     │   1.dID,IMEI,ICCID   │                  │
     ├─────────────────────►│                  │
     │                      │   2.Send token   │
     │                      ├─────────────────►│
     │                      │                  │
     │                      │   3. f(token)    │
     │                      │◄─────────────────┤
     │                      │                  │
     ├──────────────────────┤                  │
     │ 4.f(iD, IMEI, ICCID) │                  │
     │         ==           │                  │
     │      f(token) ?      │                  │
     │                      │                  │
     ▼                      ▼                  ▼
 ACTIVATED!
The first breakthrough toward activation came from notorious developer dvdjon when he released PhoneActivationServer[13].
dvdjon created an activation method by patching iTunes to use HTTP instead of HTTPS for the activation server, and redirected activation requests to the PhoneActivationServer.
The PhoneActivationServer would then send a valid Account Token to the iPhone. However, the Account Token was for a different IMEI, ICCID, and DeviceID. This method left the phone in the MismatchedICCID state, but allowed access to the user interface.
- iPhone Elite Dev Team[14]
The key part of the explanation is "valid Token". How do you generate one without the private key? It turned out you didn't need to. PhoneActivationServer always returned the same signed token captured from a successful activation (dvdjon's own phone?), regardless of the input token. That was a simple replay trick.
This was further oulined in George Hotz's presentation "Hacking the iPhone".
resending activation record to another phone
lockdownd didn't check that (iD, IMEI, ICCID) in response actually matched anything
- George Hotz[15]
The DevTeam wrote a cli named tools[16] which loaded a hard-coded signed token from a plist file, and sent it to any iPhone by tapping into iTunesMobileDevice.dll function (later improved with a standalone iPhoneInterface not requiring iTunes). The tool came with source code if you want to take a look yourself.
| Break DMG Password | Bypass Activation | Get Write Access | Get Working Toolchain | Unlock Phone | Enable Third-party Applications |
An activated phone would appear in iTunes GUI and an user could upload files such as musics and photos. So there was "some" write access. But the process taking care of the file upload (acfd) was chroot jailed to /root/Media[17]. Moreover only the user partition was mounted "rw". The system partition was mounted "r" only. The double goal was hence to break out of chroot jail (that's where the term "jaibreaking" come from btw) AND somehow be able to write in the system partition.
                ┌──────┐
                │iPhone│
┌──────┐        ├──────┤
│iTunes│        │ acfd │
└──┬───┘        └──┬───┘
   │               │
   │  write(file)  │
   ├──────────────►│
   │               │
   │               │
   │             chroot
   │               │
   │               ▼
   ▼               /root/Media
The team seems to have found a solution around July 8th 2007[18] and described a process involving the ramdisk[19].
To understand how it works, we need to know the two ways an iPhone boots. The first instructions to run when the phone boots come from the BootROM. From there a chain of loader bootstrap more and more complex stages. Note that before launching a new stage, its signature is checked so only Apple signed stuff can run. This process establishes a chain of trust all the way to Darwin kernel running the apps.
 Normal operation boot chain:

┌───────┐     ┌───┐      ┌─────┐      ┌──────┐      ┌───────────┐
│BootROM├────►│LLB├─────►│iBoot├─────►│Kernel├─────►│Normal Mode│
└───────┘     └───┘      └─────┘      └──────┘      └───────────┘
There is a second boot mode allowing iTunes to restore a phone from a bad state to a good state. When the phone boots in Recovery Mode, it stops at the iBoot stage[20]. From there the phone expects the next stage to be loaded from ram (so now we understand the dmg archive named "ramdisk", it is a disk meant to be uploaded to ram).
 Recovery mode boot chain:
                                    ┌──────────────────────────────────┐
                                    │              iTunes              │
                                    └───┬───────────┬───────────┬──────┘
                                        │           │           │ push files to
                                        ▼           ▼           ▼ restore iOS
┌───────┐     ┌───┐      ┌─────┐    ┌───────┐   ┌──────┐    ┌───────────┐
│BootROM├────►│LLB├─────►│iBoot├───x│ramdisk├──►│Kernel├───►│RestoreMode│
└───────┘     └───┘      └─────┘    └───────┘   └──────┘    └───────────┘
The DevTeam looked inside iTunesMobile.dll to find out how iTunes was writing to the filesystem to perform a restore. They found commands such as mount, umount and ditto (to copy files) and wrote a CLI tool called iPHUC, able to talk to the device in Restore Mode via iTunesMobile.dll private methods[21].
iPHUC was later published and we can look at how it works.
iBoot in Recovery Mode had an interesting property. It does not check the signature of the kernel before loading it. This is irrelevant to the topic but would later allow the DevTeam to load a patched kernel permitting execl of unsigned executables.
Now we have all the knowledge to understand the jailbreak steps detailed here.
mount to mount both system and user partition.ditto to copy both /etc/fstab and /System/Library/Lockdown/Services.plist to /root/Media.Services.plist based not in /root/Media but /./root/Media with iTunes.ditto modified files to their original location in system partition.Upon reboot, iTunes sees the whole filesystem thanks to acfd2. Since both system and user partitions are mounted "rw", the DevTeam had achieved full read/write access to the system.
                ┌──────┐
                │iPhone│
┌──────┐        ├──────┤
│iTunes│        │ acfd2│
└──┬───┘        └──┬───┘
   │               │
   │  write(file)  │
   ├──────────────►│
   │               │
   │               │
   │               ▼
   ▼               /
| Decrypt Firmware | Bypass Activation | Get Write Access | Get Working Toolchain | Unlock Phone | Enable Third-party Applications |
Later on both Activation and Write Access were automated into a Desktop MacOS X application named "INdependence".
Not much is known about how this was accomplished, except that at least twelve people worked on it[24]. By July 19, 2007 a binutils toolchain able to target ARM was completed. This gave the DevTeam the ability to run programs they authored on the device.
After many, many hours of intense work from "Nightwatch", the first independent "Hello World"* application has been compiled and launched on the iPhone. This was made possible using the "ARM/Mach-O Toolchain", Nightwatch's "special project", that he has been working on so carefully over the past few weeks. Certain parts of the toolchain (such as the assembler) are being refined and tested and these will be released as soon as possible.
It should be noted that Nightwatch has been instrumental in creating these tools, working in near isolation to get them finished. Nightwatch was also responsible for the "jail exploit" that he developed from information he and other members of the the dev team discovered.
Please join us to thank Nightwatch, Tmiw, Darkten and Daeken for making this happen.
- iPhoneDevTeam Wiki/div>
mach-o and ARM: never done before outside apple; we needed to write it ourselves (aka watch in awe as nightwatch did it)
- Geohotz<[25]/div>Another goal of the toolchain was to rebuild a header (MobileTerminal.h) able to expose private functions from
iTunesMobile.soand communicate withafcwithout the need to have iTunes running.Several presentations mention the kernel checking the signature of an executable before allowing an
execl. The first iPhone did not do that, it was likely something introduced in v1.1.1.Unlock Milestone
Finally, we reach the last item and the goal of the whole effort. The DevTeam got there around Aug 14, 2007. Note that the color is orange, not red. It seem they knew an unlock was imminent.
Decrypt Firmware Bypass Activation Get Write Access Get Working Toolchain Enable Third-party Applications Unlock Phone Before we continue, just a few words about the structure of the iPhone. The smartphone is actually made of two parts. The smart, which is iOS and the phone/modem (with its firmware called "baseband"). These are two distinct systems, with their own RAM, own CPU, own storage, own firmware, even their own oscillators. They communicate together over an UART line (mounted on
/dev/tty.baseband) using AT commands (e.g.: Send an SMS with AT Commands).┌─────────────────────────────────────────────────────────┐ │ iPhone │ │ │ │ ┌────────────┐ ┌───────────────┐ │ │ │ │ UART │ │ │ │ │ iOS │◄───────────────────►│ Baseband │ │ │ │ │ /dev/tty.baseband │ │ │ │ └────────────┘ └───────────────┘ │ └─────────────────────────────────────────────────────────┘How the unlock process worked was well known from almost day one (gory details here).
We even know the AT command to do the unlock. It's 'AT+CLCK="PN",0,"xxxxxxxx"'.
But good luck finding those x's. They are called the NCK, or Network Control Key, and are believed to be unique in everyones phone. Forget brute force (time impractical) and the obvious entries. If you still think bruteforce is a good idea, read this.
Further, there is a limit of 3-10 unlock attempts per phone, after which the firmware will "hard-lock" itself to AT&T.
- iPhoneDevTeam wikiThe baseband also has a BootROM, and a chain of loaders establishing a chain of trust so everything ends up being verified against a signature. The keys are of course only available at runtime, and can't be extracted. Furthermore, working with the baseband was difficult.
Now the big thing about the baseband, and the most irritating thing, is that there is no DFU/Recovery Mode, and I've always been jealous of planetbeing and wizdaz and pumpkin and all these guys because they always had a failsafe to basically give them a free pass to do everything you think of to the phone.
Some of us at several points have completely erased the NOR, and completely invalidated the LLB and things like that. And, what happens if you have an invalid LLB in there, which is sort of that second stage, is your phone basically just rapidly flashes away in black with like these horrible looking sere (?) marks going down the screen, and it's very scary to watch, and you think it's completely gone and we nicknamed it "Christmas Tree Mode".
But, as bad as it looked at the time, as long as you were good with your timing of your fingers, you can always enter DFU Mode and recover from that. There is nothing like that in the baseband; there are things you can do the the baseband and to the NOR, or the images in the NOR, that can permanently brick your phone.
- MuscleNerd[26]By July 2007 that DevTeam had reverse engineered the baseband from the ipsw archive. Furthermore they had studied the executable in charge of updating the baseband,
/usr/local/bin/bbupdaterfound in the ramdisk. They knew all the commands to upload a new one.This lead to a first command-line
iUnlockwhich involved having many files (such as a dumped firmware "nor", and secpack file "ICE03.12.06_G.fls"). Soon after, they released a simpleranySIMapp which could be uploaded to the phone and ran with a simple button.Since the source code was also published, we can look inside and follow how it works.
- Open
/dev/tty.basebandand setup modem parameters (e.g.: baud).fd = open("/dev/tty.baseband");- Dump baseband (a.k.a NOR, size = 4MiB) to /tmp.
- Load baseband to RAM.
- LoadSecpack (a file from the ramdisk named ICE03.12.06_G.fls)
- Patch baseband instruction in RAM (make any NCK allow an unlock).
int offset = 0x216f28; Buffer[offset + 0] = 0x01; Buffer[offset + 1] = 0x00; Buffer[offset + 2] = 0xa0; Buffer[offset + 3] = 0xe3;- Push back baseband.
SendBeginSecpack(fd, secpack); \\ secpack explanation here free(secpack); SendErase(fd, 0xA0020000, 0xA03bfffe); Seek(fd, 0xA0020000 - 0x400); // Firmware must be at 0xA0020000. WTH? unsigned char foo[0x400]; memset(foo, 0, 0x400); SendWrite(fd, foo, 0x400, false); SendWrite(fd, fw, fwsize, true); SendEndSecpack(fd); ValidateFW(fd, 0xA0020000, fw, 0x800);- Unlock.
  AT+CLCK="PN",0,"00000000"
  AT+CLCK="PN",2
In summary, what
anySIMdoes is dump the baseband firmware (while the phone is running, pretty cool), patch it [27] (with raw bytes writing, also pretty cool!), and upload it back. Except this should not work since the firmware signature is checked upon upload and the firmware is patched. The firmware upload should fail the signature check.It seems the magic trick lies with the minus 0x400 offset. Why it works is less than clear, even with GeoHotz explanation.
The first 0x400 bytes aren't written until the signature verifies. So start writing 0x400 bytes earlier :-)
- GeohotzAfter the publication of this article, the kind people of Hackernews chipped in to explain[28] how
-0x400works. It goes as follows.The baseband receives the new firmware in chunks of up to
0x800bytes. It cannot store the whole 4MiB in RAM, then checksum, and finally write to flash. Instead, bytes are written to flash as they are received, except for the first0x400bytes which are buffered in RAM. When the firmware is fully uploaded, the baseband does the checksum. If the test fails, the buffered bytes are discarded without being written to flash (the baseband has a corrupted firmware and will fail to start). If the firmware passes the test, the0x400bytes are written at the beginning of the firmware.The
-0x400trick works by first writing garbage 0x400 bytes at offset minus0x400bytes from where the firmware should be written. Then the 4miB firmware is sent (the offset matches exactly where the firmware should be). When the cheksum test inevitably fails the garbage bytes are discarded. But the entire new firmware was properly flashed!
Decrypt Firmware Bypass Activation Get Write Access Get Working Toolchain Enable Third-party Applications Unlock Phone Putting it all togetherThe complete list of instructions to unlock was published on September 12, 2007. Along them were published per-continent testimonies [29] and most interestingly Canada[30].
Epilogue
Apple lost no time in releasing iPhone firmware V1.1.1 on 27th Sept 2007. The progress bar was reset[31] and the cat and mouse game started. It has been ongoing ever since.
Decrypt 1.1.1 Get Write Access 1.1.1 Activate 1.1.1 Unlock 1.1.1 Enable Third-party Applications 1.1.1 Going deeperIf you are interested in further archeology about the 2007 unlock, here is a list of links to checkout.
- iPhone Dev Team Past_Progress_Reports page (features gold such as
we now own activation).- 25c3: Hacking the iPhone presentation by MuscleNerd, pytey, planetbeing.
- Evolution of iPhone Baseband and Unlocks presentation by MuscleNerd (slides).
- GeoHotz presentation for "La nuit du hack at Paris".
One More ThingThis article was made possible by the awesomeness of the Internet Archive and its WayBack machine. Take a minute to donate.
References
*