BumpMapping with GLSL
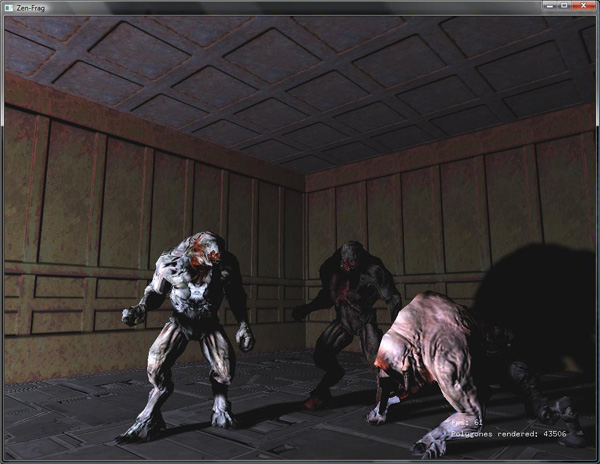
 When I got started learning bump mapping and parallax mapping, I found a lot of tutorial involving a simple rectangle but nothing close to real life usage:
This is my attemps to fill the gap.
Concept
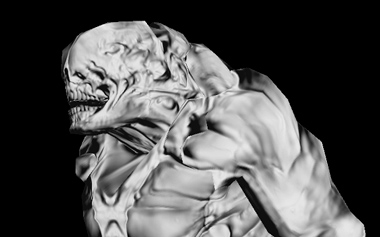
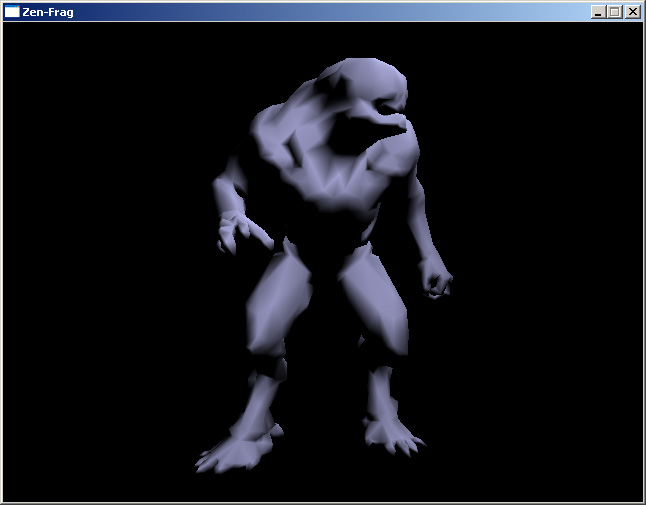
BumpMapping allows designers to express their creativity through a 100,000+ polygons creature. Once art is done, a low poly model (5000 polygons) is automatically generated along with a normal map.
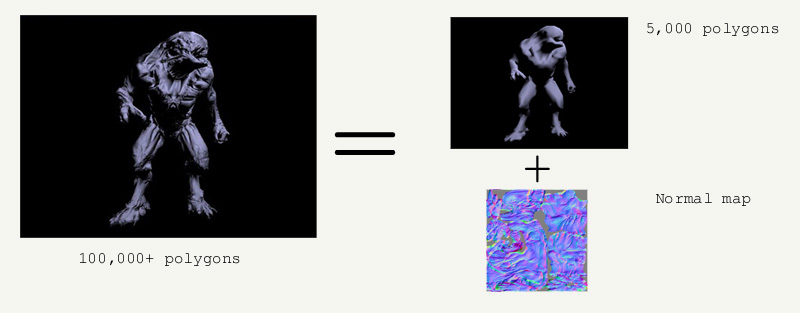
At runtime, details are added back by combining the low model with the normal map.
Illumination model.
Details are added back to the low poly via surface reaction to the light. The illumination equation is Blinn-Phong where:
pixelColor= Ambient + (Diffuse + Specular) * Shadow ( but let's forget about shadow).
Ambient = ambientMaterial * ambientLight
Diffuse = diffuseMaterial * diffuseLight * lamberFactor
lamberFactor = max (dot (lightVec, normal), 0.0)
Specular = specularMaterial * specularLight * speculatCoef
speculatCoef = pow (max (dot (halfVec, normal), 0.0), shininess)
Details:
- Ambient is pretty much a constant.
- Diffuse depends on the angle between the light vector and the surface normal vector.
- Specular depends on the angle between the eye vector and the surface normal vector.
Note: As we deal with normal vectors, a cosinus can be obtained with a simple dot product.
Usually, every calculations are done in eye space, but in bump mapping the normal vector from the normal map are expressed in Tangent space.
We hence need to transform all of the vectors requiered . In order to do this, we use a matrix: Eye space -> Tangent space.
Tangent space maths.
The matrix for each vertex is as follow:
	[	Normal.x 	Normal.y 	Normal.z	]
	[	BiNormal.x	BiNormal.y	BiNormal.z	]
	[	Tangent.x	Tangent.y	Tangent.z	]
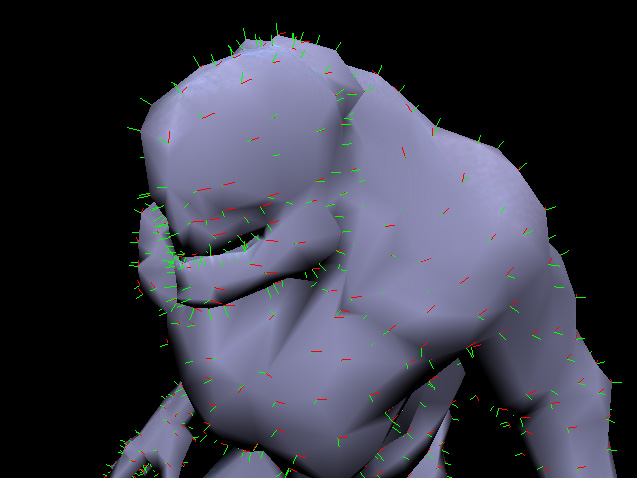
Normal is easy to calculate. A simple cross-product per face. The normal for a vertex is equal to the sum of normals (all faces related to this vertex), normalized at the end.
	for each faces in model
	{
		generate the face's normal via cross product
		fore each vertex in the face, add the normal vector
	}

	for each vertices in model
		normalize normal vector
For the tangent and binormal, you can find the solution in any good math book ( I highly recommend Mathematics for 3D Game Programming ). Here is a code sample:
	generateNormalAndTangent(float3 v1, float3 v2, text2 st1, text2 st2)
	{
		float3 normal = v1.crossProduct(v2);

		float coef = 1/ (st1.u * st2.v - st2.u * st1.v);
		float3 tangent;

		tangent.x = coef * ((v1.x * st2.v)  + (v2.x * -st1.v));
		tangent.y = coef * ((v1.y * st2.v)  + (v2.y * -st1.v));
		tangent.z = coef * ((v1.z * st2.v)  + (v2.z * -st1.v));

		float3 binormal = normal.crossProduct(tangent);
	}
Just like normals: tangents and binormals are accumulated for each faces connected to this vertex and then averaged via normalization.
In your implementation, try to visualize the vectors you generate, they need to be consistant because they will be interpolated by the GPU.
CPU side
On the openGL side, a few things have to be done:
- Bind the vertex array
- Bind the normal array
- Bind the texture coordinate array
- Bind the elements index array
- Bind the tangent array to the shader
- Bind the color texture
- Bind the normalmap texture (bump mapping)
- Bind the heightmap texture (parallax mapping)
	// The vertex VBO is updated every frame for animation purpose
	glBindBufferARB(GL_ARRAY_BUFFER_ARB,vboVertexId);
	glVertexPointer (3, GL_FLOAT, 0, 0);

	// Same as vertex VBO: updated every frames
	glBindBufferARB(GL_ARRAY_BUFFER_ARB,vboNormalId);
	glNormalPointer(GL_FLOAT,0, 0);

	// VBO, created and populated once, texture coordinate never change
	glBindBufferARB(GL_ARRAY_BUFFER_ARB,vboTexturId);
	glTexCoordPointer(2,GL_FLOAT,0,0);

	// Tangent generated previously, no need to pass the binormal, a cross product will generate it
	glVertexAttribPointerARB(tangentLoc, 3, GL_FLOAT,GL_FALSE, 0, tangentArraySkinPointer);

	// VBO, created and populated once, elements to draw never change
	glBindBufferARB(GL_ELEMENT_ARRAY_BUFFER_ARB,vboElementsId);
	glDrawElements (GL_TRIANGLES, meshes[i].facesCount * 3 , GL_UNSIGNED_INT, 0);


	glActiveTextureARB(GL_TEXTURE0);
	glBindTexture(diffuseTextureId);
	glUniform1iARB(diffuseTextureUniform,0);

	glActiveTextureARB(GL_TEXTURE1);
	glBindTexture(normalTextureId);
	glUniform1iARB(normalTextureUniform,0);

	glActiveTextureARB(GL_TEXTURE2);
	glBindTexture(heightTextureId);
	glUniform1iARB(heightTextureUniform,0);
GPU side
The role of the vertex shader is to build the matrix and rotate vectors used in Blinn-Phong model, hence:
- Generate the bi-tangent with a cross-product from normal and tangent.
- Assemble the three vectors to form a rotation matrix, from camera space to tangent space.
- Rotate light and camera vectors.
In the fragment shader:
- Retrieve the normal coordinate from the normal map texture.
- Convert value from [-1,1] to [0,1].
- Calculate angles, generate ambiant, diffuse and specular.
- Add ambiant, diffuse and specular component.
	attribute vec3 tangent;
	varying vec3 lightVec;
	varying vec3 halfVec;
	varying vec3 eyeVec;


  void main()
  {

	gl_TexCoord[0] =  gl_MultiTexCoord0;

	// Building the matrix Eye Space -> Tangent Space
	vec3 n = normalize (gl_NormalMatrix * gl_Normal);
	vec3 t = normalize (gl_NormalMatrix * tangent);
	vec3 b = cross (n, t);

	vec3 vertexPosition = vec3(gl_ModelViewMatrix *  gl_Vertex);
	vec3 lightDir = normalize(gl_LightSource[0].position.xyz - vertexPosition);


	// transform light and half angle vectors by tangent basis
	vec3 v;
	v.x = dot (lightDir, t);
	v.y = dot (lightDir, b);
	v.z = dot (lightDir, n);
	lightVec = normalize (v);


	v.x = dot (vertexPosition, t);
	v.y = dot (vertexPosition, b);
	v.z = dot (vertexPosition, n);
	eyeVec = normalize (v);


	vertexPosition = normalize(vertexPosition);

	/* Normalize the halfVector to pass it to the fragment shader */

	// No need to divide by two, the result is normalized anyway.
	// vec3 halfVector = normalize((vertexPosition + lightDir) / 2.0);
	vec3 halfVector = normalize(vertexPosition + lightDir);
	v.x = dot (halfVector, t);
	v.y = dot (halfVector, b);
	v.z = dot (halfVector, n);

	// No need to normalize, t,b,n and halfVector are normal vectors.
	//normalize (v);
	halfVec = v ;


	gl_Position = ftransform();

  }
Fragment shader
	uniform sampler2D diffuseTexture;
	uniform sampler2D normalTexture;

	// New bumpmapping
	varying vec3 lightVec;
	varying vec3 halfVec;
	varying vec3 eyeVec;


  void main()
  {

	// lookup normal from normal map, move from [0,1] to  [-1, 1] range, normalize
	vec3 normal = 2.0 * texture2D (normalTexture, gl_TexCoord[0].st).rgb - 1.0;
	normal = normalize (normal);

	// compute diffuse lighting
	float lamberFactor= max (dot (lightVec, normal), 0.0) ;
	vec4 diffuseMaterial = 0.0;
	vec4 diffuseLight  = 0.0;

	// compute specular lighting
	vec4 specularMaterial ;
	vec4 specularLight ;
	float shininess ;

	// compute ambient
	vec4 ambientLight = gl_LightSource[0].ambient;

	if (lamberFactor > 0.0)
	{
		diffuseMaterial = texture2D (diffuseTexture, gl_TexCoord[0].st);
		diffuseLight  = gl_LightSource[0].diffuse;

		// In doom3, specular value comes from a texture
		specularMaterial =  vec4(1.0)  ;
		specularLight = gl_LightSource[0].specular;
		shininess = pow (max (dot (halfVec, normal), 0.0), 2.0)  ;

		gl_FragColor =	diffuseMaterial * diffuseLight * lamberFactor ;
		gl_FragColor +=	specularMaterial * specularLight * shininess ;

	}

	gl_FragColor +=	ambientLight;

  }
Results

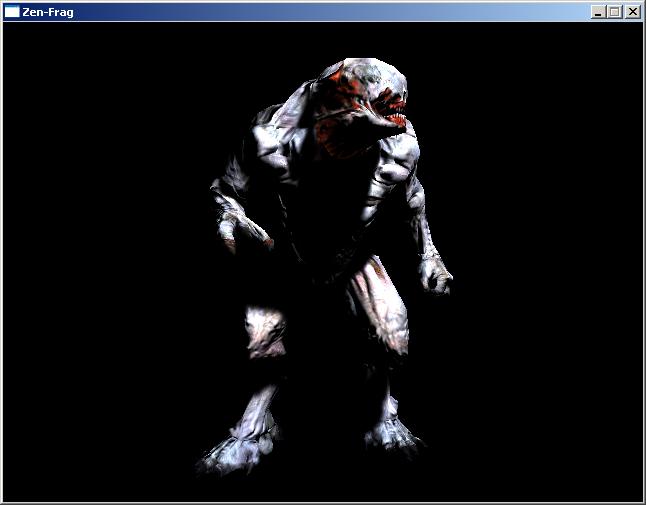
Note: The shadow component is not in the shader snippet but you can find it in the downloaded code.
Video
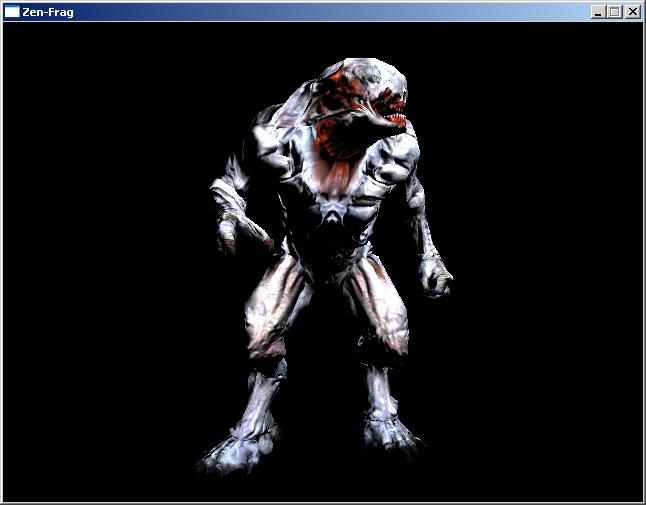
The video shows a 2000 polygons Hellknight:
- Raw model.
- Model with 512x512 bump mapping.
- Model with 512x512 bump mapping and diffuse/specular mapping.
- Model with 512x512 bump mapping and diffuse/specular mapping and shadow.
The code features a C++ md5 model viewer, you can configure a lot via config.cfg and define the scene in scene.cfg. I included the hellknight md5 so anybody can run the demo, I hope this will be tolerated as a matter of educationnal purpose.
Downloads
April, 5 2010 : It seems the binary distribution doesn't work with Windows 7. I'll have to take a look at this as soon as I have some time.
Recommended reading
A few books to learn more about bump mapping and parallax mapping. Doom3 is a great ressource to learn as well, every models are easily accessible and in plain text.